
An Introduction to Shell Based Fur Technique
gFur is based on the well known shell-based technique. Single fur hair is generated by a sort of optical illusion when we draw it by it’s cross-sections along the hair length. These cross sections have to be close enough to generate the illusion of solid, continuous hair. There lies one of the main limitations of the technique – the longer hair we want to generate, the more cross-sections we need before the illusion of continuous hair breaks down and the more cross-sections we have, the higher is the performance hit. So, as with many real-time features, it’s important to strike a balance between the visual appearance of the fur and the performance cost. There are a few options available for optimizations that we will deal with another time.
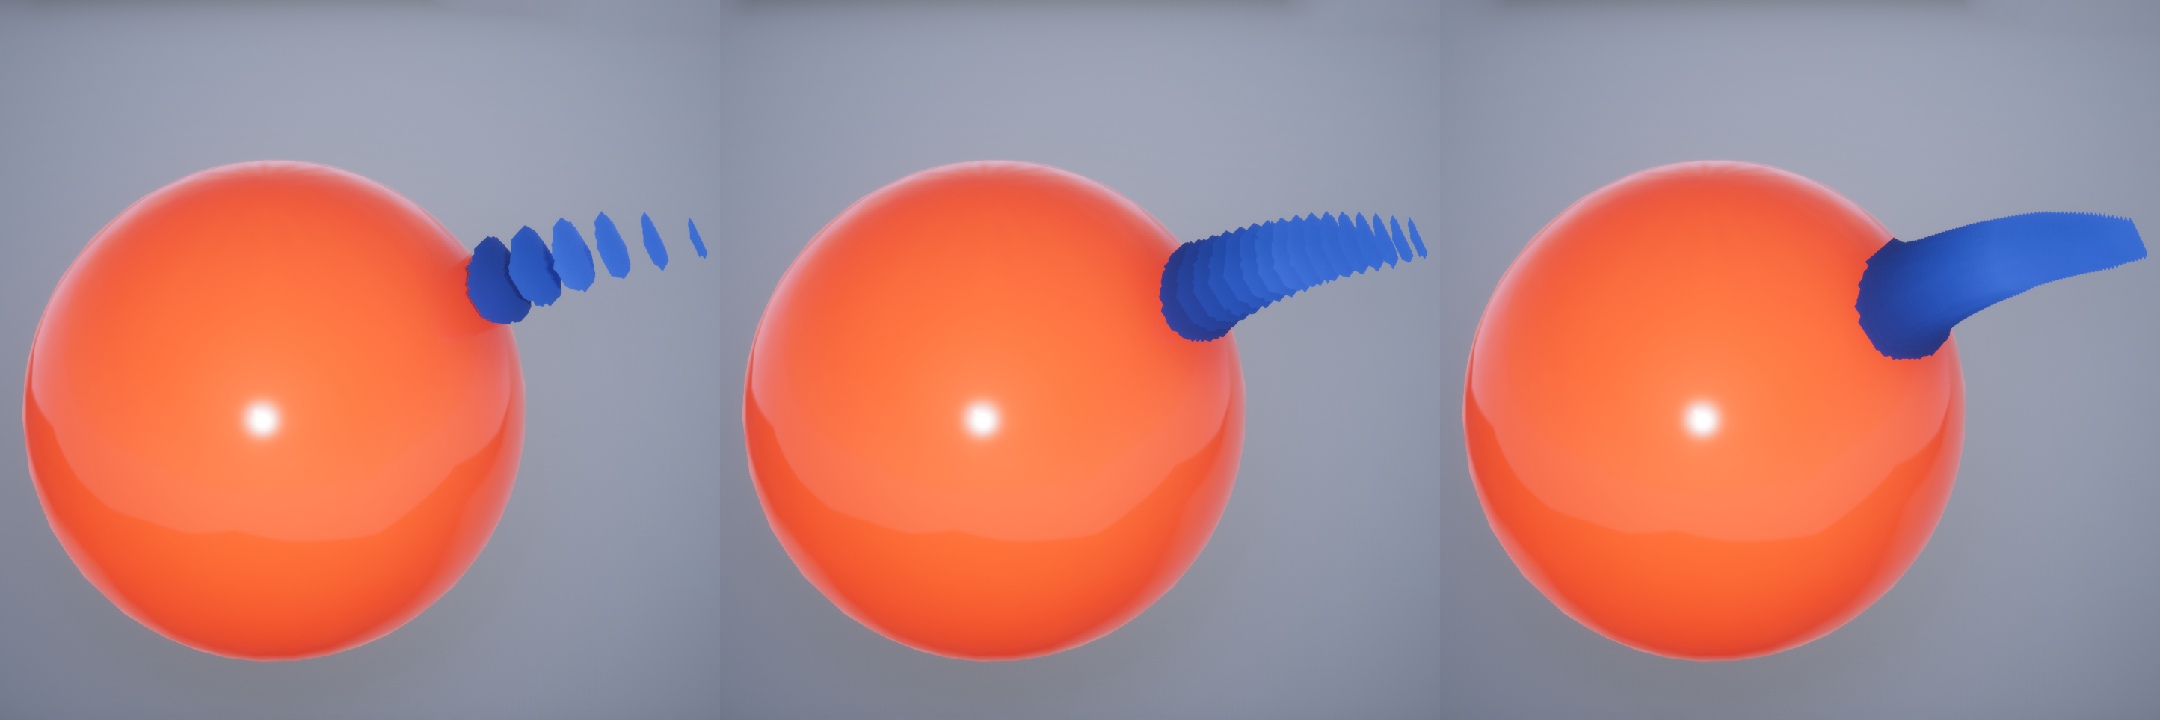
6, 16 and 64 cross sections with single fur hair.
Dense fur is achieved by drawing multiple fur hair cross-sections on a single polygon. If we take a sphere for an example, and we want to cover it with fur, we need to duplicate the sphere and inflate it’s surface just so slightly that we get the first layer on which we draw the first cross section of the fur hairs. Then we continue adding more layers, each slightly above the other until we reach the intended tip of the fur. The layers are also called “shells”, hence the name of the technique.
At this point, we have a lot of spheres and we can only see the highest level of solid sphere. The next step is to remove everything and only keep the hair cross-sections. This is achieved in a material shader by use of a texture with hair cross-section pattern. A typical cross-section pattern texture has lot of black colour (parts that will not be rendered) and lot of white dots (these are the cross sections of the hair). Texture is usually smaller in dimensions (256×256 or so) and is tiled across the surface many times. This same texture is applied to all the layers that makes up the final fur.
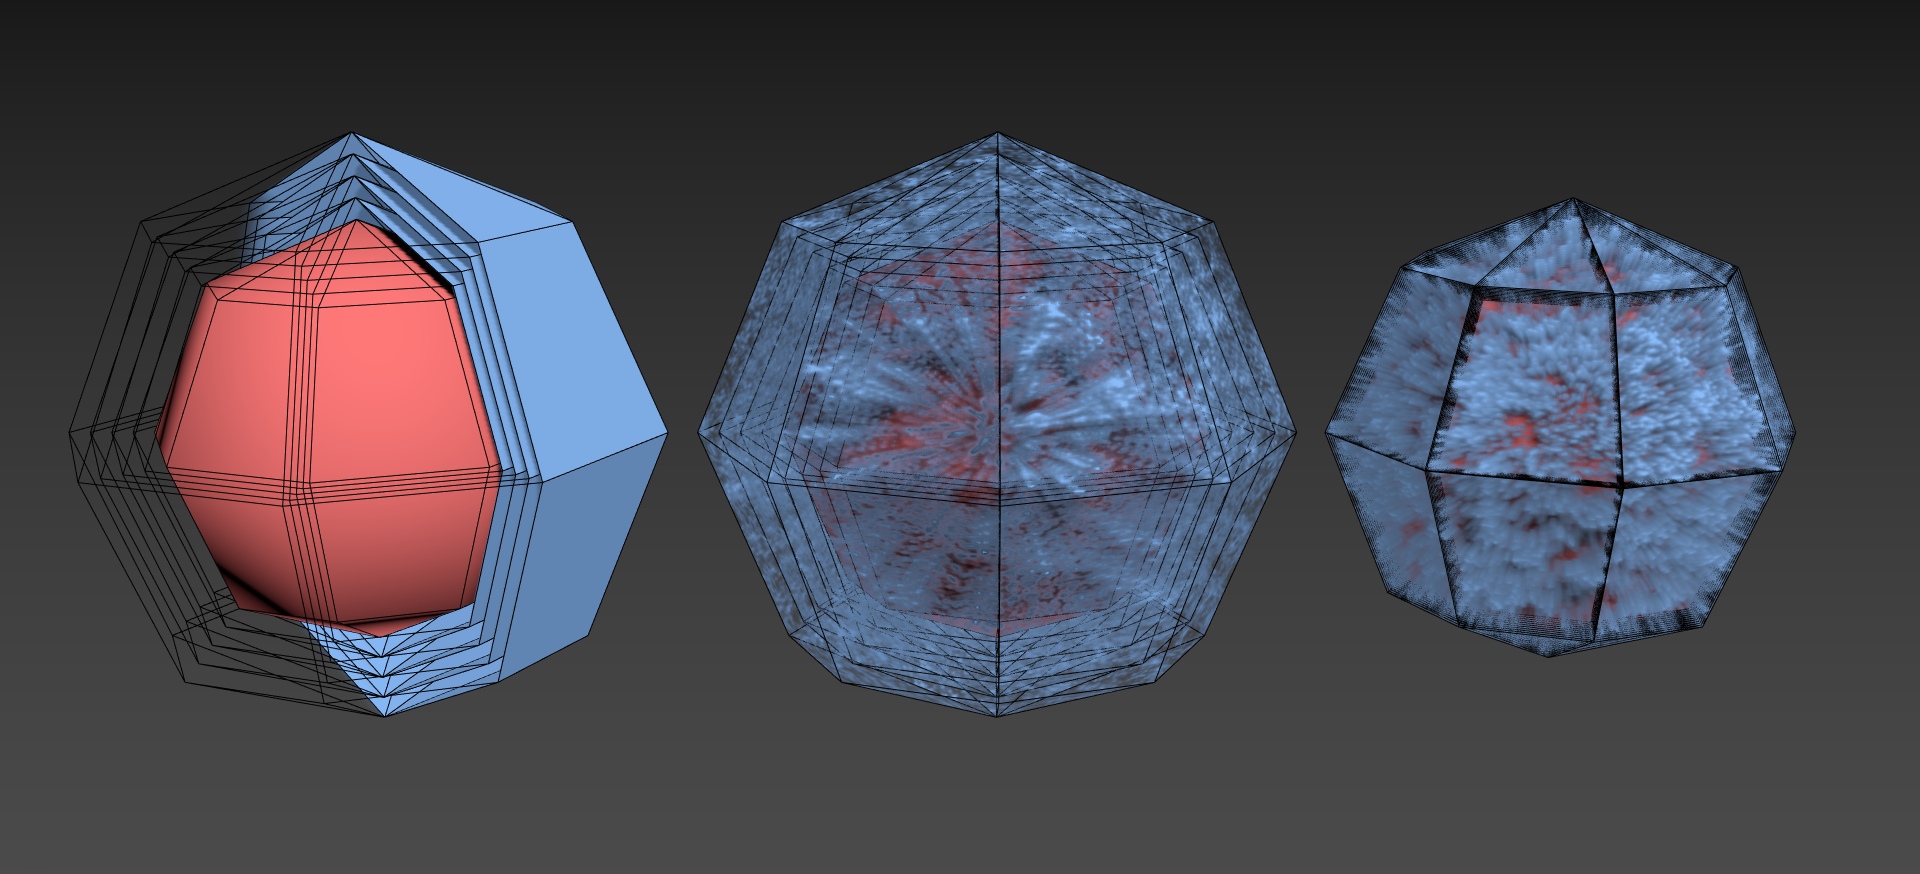
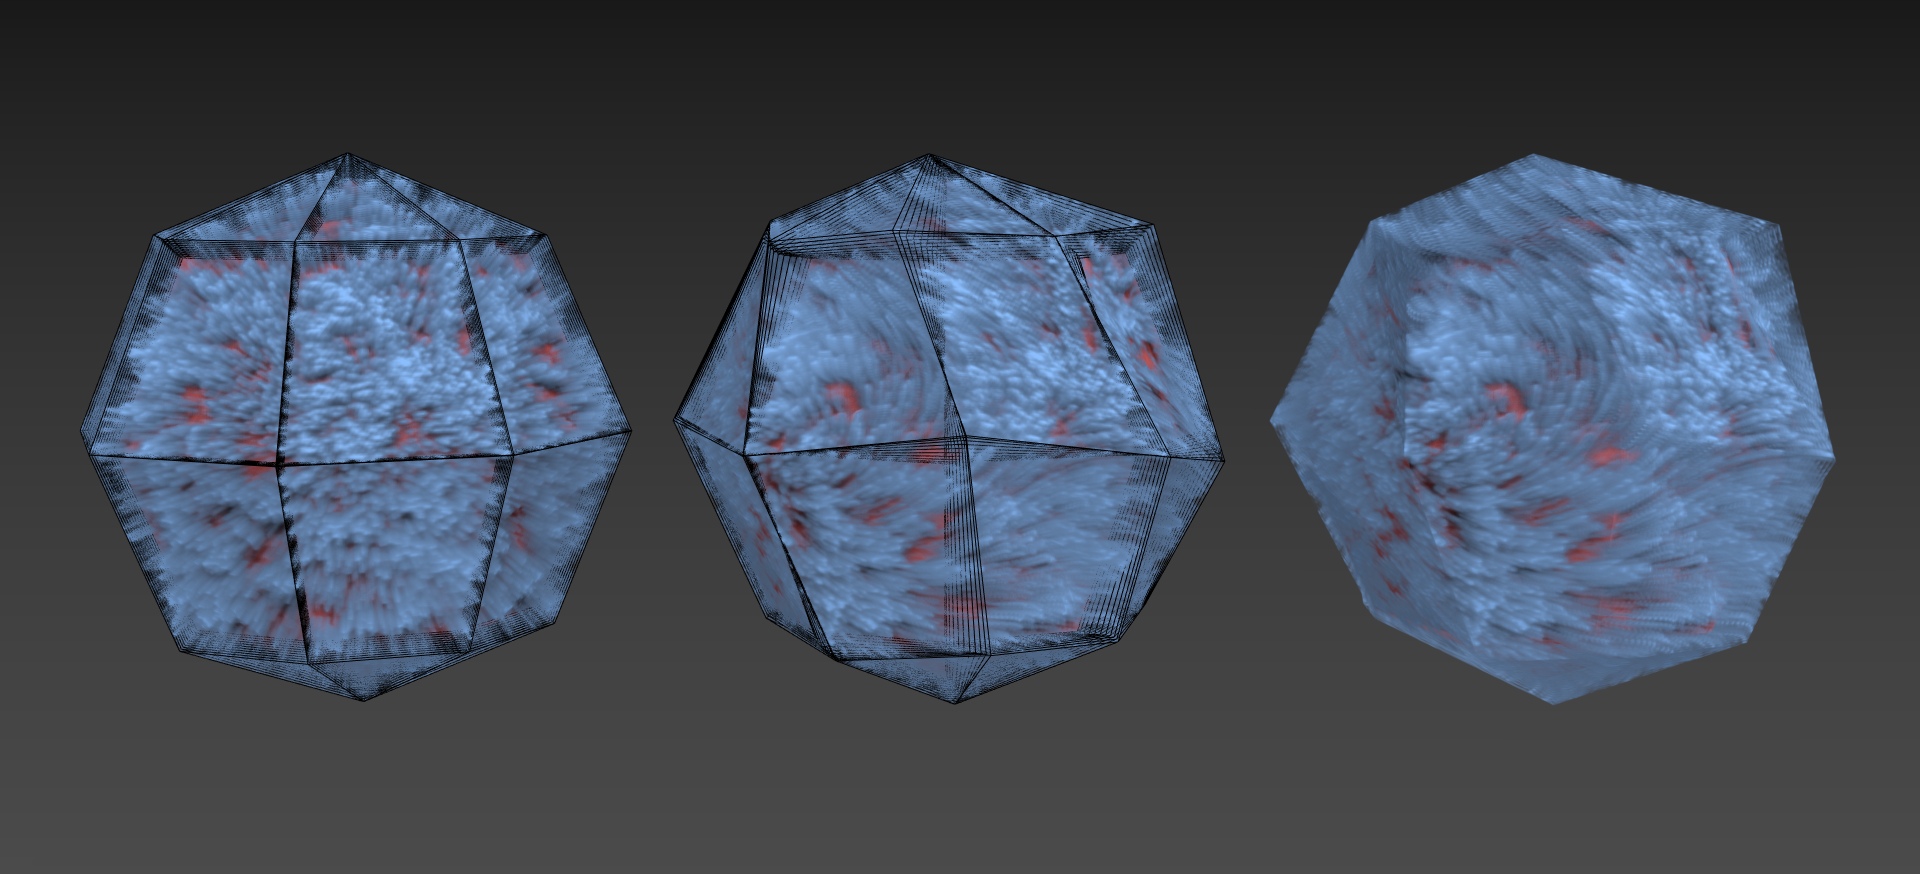
From left to right: Cross-sections of red base sphere with blue shells; Blue shells after removing what is NOT fur; Bringing the shells closer together for more convincing look.
As you can notice, we have a pretty uniform looking (boring) fur. There are a few options that allow us to tweak the look:
• we can add some variation to the vertexes of different layers/shells – this is used to give the fur basic shape and styling
• fur pattern modifications – main use is to give fur hair thickness variation
• we can modify UV of the material shader that draws the cross sections – this is similar to the first option, but we control the effect in material
• we can also modify the position of the vertexes of the shells from the material shader
The first option – variation of the shells makes use of the fact that if we move the vertexes of the shell they will “take” the UV mapping with them which in turn will “move” the cross sections drawn by the texture pattern. By moving the cross sections, we give appearance of change in position of fur hair along its length. Here lies another limitation of the technique. We can’t make too great variations in the position of vertexes of different shells because we can introduce too much stretching to the texture pattern which in turn will break up the illusion of continuous fur hair. We have to be careful when moving the vertexes in the direction towards or away from the surface of the object because we want to avoid the layers to cross each other which usually leads to visuall errors.
So it’s best for the variations we want to add to the shells to be gradual and reasonably limited. Gradual usually means that we don’t move shells at the bottom much and we move them more towards the tip of the fur.
Currently we have two options how to affect the vertexes of the fur shells for the shape and styling. First option is to use “Guide Splines” and the other is to use “Mesh Guides”. We will have a look at those in a separate guide.
The other major way to affect the look of fur is to modify the fur pattern texture. We can achieve this in material shader because the gFur shell generating component is sending information to the material shader. The information is conveyed by a black and white gradient that says how far a particular shell is from the original surface.
This information can be used for different purposes, but one of the most important use cases for the look of the fur is to make the single hair thicker or thinner along its length. Typically we want to have the hair thicker at the base and thinner at the tip. This is achieved by modifying the radius of the cross section of the hair generated by the fur pattern texture. This modification of the radius is possible because of a little trick – fur texture pattern uses full range of greyscale values, but when we are removing areas of the shells that will reveal the space between the fur hair we are using only binary values – black or white, where black = empty space and white = hair cross-section.
In material shader, we can then decide or pick which greyscale values of the pattern will be treated as fully white and which as fully black. Because in material shader we have the information about how far a particular shell is from the surface, we can combine those and by using single fur pattern texture, we can generate different hair cross-section radiuses at different distance from the original surface.
We have a few more options that are complementary to the first two already mentioned. We can affect the UVs in the material shader, which will move the fur pattern resulting in an effect similar to moving the vertexes of the shell. We are using this in gFur advanced shader for clumping effect among the others.
We can also move the vertexes of the shells from the material through vertex shader. In gFur advanced shader we are using this feature for the procedural wind effect.
Gradually displacing vertexes of the shells leads to visual variation to the fur hair.